Well, it has been a little while since I plugged the NOCF 2015 Charity Army Raffles here on my blog, but today I get to do it and give you a couple of step-by-steps along the way : )
If you want to buy tickets to win the Librarian pictured above (and the rest of the excellent Sons Of Orar Army), please head to the NOCF site
HERE!
Or visit after you've taken a quick scroll through here to see the various steps I took to paint up this very cool model.
BLUE
Step One: Prime the model in black.
Step Two: Paint the blue armor with
VMC Dark Prussian Blue.
Step Three: Highlight the armor with a 60/40 mix of
VMC Dark Prussian Blue and
VGC Ultramarine BlueStep Four: Highlight the armor with a 20/80 mix of
VMC Dark Prussian Blue and
VGC Ultramarine Blue.
Step Five: Highlight the top edges with a 70/30 mix of
VGC Ultramarine Blue and
VMC White.
WHITE
Step One: Basecoat the white areas with
VMC Pale Grey.
Step Two: highlight the areas with a 60/40 mix of
VMC Pale Grey and
VMC White.Step Three: highlight the areas with a 30/70 mix of
VMC Pale Grey and
VMC White.Step Four: Highlight the areas with
VMC White.
FLESHStep One: Basecoat the flesh with
VGC Tan.Step Two: Highlight the flesh with a 70/30 mix of
VGC Tan and VGC Dwarf Skin.Step Three: Highlight the flesh with a 30/70 mix of
VGC Tan and VGC Dwarf Skin.
Step Four: Highlight the flesh with
VGC Dwarf Skin.Step Five: Highlight the flesh with a 70/30 mix of
VGC Dwarf Skin and
VMC Pale Sand.
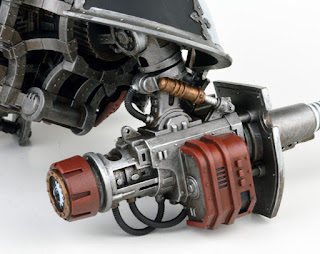
RED
Step One: Basecoat the red areas with
VMC Hull Red.
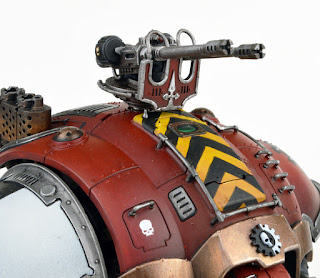
Step Two: Highlight the red areas with a 60/40 mix of
VMC Hull Red and
AP Dragon Red.
Step Three: Highlight the red areas with a 20/80 mix of
VMC Hull Red and
AP Dragon Red.
At this point I went through and started my "corrections" by painting everything that wasn't going to be blue, white, flesh, or red with black. From there I painted the silvers and golds as well as the variety of little bits and bobs around the place.
So, as I posted earlier, click
HERE to get to the page to buy the raffle tickets for the Space Marines. You do not need to be present to win, and we will ship ANYWHERE in the world!
If you'd like to check out the 40K Armies in more detail, please visit the NOCF blog that I've been updating regularly over the last two months,
HERE.
More to come on this as we close in on the whole NOVA Open event thingy!
Cheers
Dave